This manual provides essential guidance for operating and maintaining the Grasshopper 725D mower, ensuring safe and efficient use. It covers key features, safety tips, and maintenance routines to optimize performance.
1.1 Importance of the Manual for Operators
The Grasshopper 725D manual is crucial for operators to ensure safe and effective operation. It provides detailed instructions, safety precautions, and maintenance guidelines, helping operators avoid accidents and extend the mower’s lifespan. By following the manual, users can troubleshoot issues, understand control functions, and optimize performance. It serves as a comprehensive guide, empowering operators to maximize efficiency while adhering to safety standards and manufacturer recommendations.
1.2 Overview of the Grasshopper 725D Model
The Grasshopper 725D is a high-performance zero-turn mower designed for efficient cutting and durability. Featuring a robust engine and advanced cutting system, it offers precision and reliability. With options like manual deck lifts and customizable settings, it suits various mowing needs. Built with tubular steel frames and robust components, the 725D ensures long-term durability and consistent performance, making it ideal for both residential and commercial use.

Safety Guidelines and Precautions
Always read instructions carefully before operating. Wear protective gear and avoid unsafe practices to ensure safe mower operation and prevent accidents.
2.1 General Safety Instructions
Safety is paramount when operating the Grasshopper 725D. Always wear protective gear, including gloves, safety glasses, and sturdy footwear. Ensure the mower is on level ground before dismounting. Keep bystanders, especially children, away from the operating area. Read and follow all warnings in the manual. Regularly inspect the mower for damage or wear. Never operate the mower under the influence of alcohol or drugs. Failure to follow these guidelines may result in injury or equipment damage.
2.2 Warning Labels and Symbols
The Grasshopper 725D manual includes specific warning labels and symbols to alert operators of potential hazards. These labels are designed to prevent accidents and ensure safe operation. Always read and understand the meaning of these symbols before using the mower. Common symbols include warnings for sharp edges, hot surfaces, and electrical components. Ignoring these labels can lead to serious injury or equipment damage. Familiarize yourself with all safety indicators to operate the mower responsibly and safely.
2.3 Protective Equipment Recommendations
Protective equipment is crucial for safe operation of the Grasshopper 725D. Always wear safety glasses, gloves, and closed-toe shoes to prevent injury. Avoid loose clothing that could get caught in moving parts. A hat and hearing protection are also recommended, especially in noisy environments. Ensure proper attire to minimize risks while operating or maintaining the mower. Failure to use recommended protective gear can lead to serious harm. Prioritize safety by following these guidelines consistently.
Operating the Grasshopper 725D
Mastering the operation of the Grasshopper 725D involves understanding its controls, starting procedures, and adjustment mechanisms to ensure safe and efficient mowing experiences.
3.1 Starting and Stopping the Mower
Starting and stopping the Grasshopper 725D requires careful attention to safety guidelines. Always read the manual thoroughly before operating. Ensure the parking brake is engaged and the PTO is disengaged. Start the engine using the ignition key, allow it to warm up briefly, then engage the PTO for mowing. To stop, disengage the PTO, reduce speed, and turn off the ignition. Ensure the mower comes to a complete stop before exiting. Regular checks ensure optimal performance and safety.
3.2 Basic Controls and Joystick Functionality
The Grasshopper 725D features intuitive controls, with the joystick playing a central role in maneuverability; It allows smooth operation of the mower’s movement, speed, and deck adjustments. Operators can customize settings to suit their preferences. The joystick also integrates safety features, ensuring functions are enabled only when the operator is actively controlling the mower. Familiarizing yourself with these controls enhances efficiency and safety during operation. Regular practice improves proficiency in navigating various terrains and maintaining precise control.
3.3 Adjusting the Deck Height and Settings
Adjusting the deck height on the Grasshopper 725D ensures optimal cutting performance. Use the manual lift system or optional PowerFold electric adjustment to set the deck height between 1–4 inches. For precise cutting, align the gauge wheels to maintain even contact with the ground. Regularly check and tighten all deck bolts to prevent vibration. Proper deck settings enhance mower efficiency and prolong blade life, ensuring a professional-grade finish for your lawn.

Maintenance and Servicing
Regular maintenance ensures the Grasshopper 725D operates efficiently. Perform daily checks on tire pressure, oil levels, and blade sharpness. Schedule routine servicing for optimal performance and longevity.
4.1 Daily Maintenance Checks
Performing daily maintenance checks ensures the Grasshopper 725D operates safely and efficiently. Inspect tire pressure, oil levels, and hydraulic fluid. Check the mower blades for sharpness and damage. Ensure the deck is clean and free of debris. Verify all safety features are functioning properly. Regularly greasing pivot points and checking belt tension prevents wear. Addressing issues promptly extends equipment lifespan and maintains performance quality.
4.2 Routine Servicing Schedule
A routine servicing schedule is crucial for maintaining the Grasshopper 725D. Replace air filters every 100 hours and oil every 200 hours. Check hydraulic fluid levels monthly and change annually. Inspect and replace mower belts as needed. Sharpen blades regularly for optimal cutting performance. Follow the recommended schedule to ensure longevity and prevent unexpected breakdowns, keeping your mower in peak condition throughout the season.
4.3 Lubrication and Fluid Levels
Regular lubrication and fluid checks are vital for the Grasshopper 725D’s performance. Check hydraulic fluid levels monthly and change them annually. Use the recommended oil grade for engine lubrication, replacing it every 200 hours. Grease pivot points and deck components seasonally. Ensure proper fluid levels in the transmission and coolant systems. Always use genuine Grasshopper parts to maintain warranty and performance standards. Proper lubrication prevents wear and extends the mower’s lifespan, ensuring smooth operation and reliability.
Parts and Accessories
Explore genuine Grasshopper parts and accessories designed for the 725D model. These include deck upgrades, hydraulic components, and maintenance essentials to enhance performance and longevity.
5.1 Identifying Key Components
Identify essential components of your Grasshopper 725D, such as the hydraulic manual lift system, joystick controls, and wiring diagrams. Familiarize yourself with the deck options, including PowerFold electric lift and FoldUp decks. Understand the importance of genuine Grasshopper parts for optimal performance and safety. Use the provided diagrams to locate key systems and ensure proper maintenance. Always refer to the manual for accurate component identification and troubleshooting guidance.
This knowledge will help you maintain and upgrade your mower effectively.
5.2 Genuine vs. Aftermarket Parts
Always prioritize genuine Grasshopper parts to ensure safety, reliability, and warranty compliance; Aftermarket parts may cost less but can compromise quality and void your warranty. Genuine components are engineered to meet strict standards, guaranteeing optimal performance and compatibility. Avoid risks associated with non-authentic parts by sourcing directly from authorized dealers. Check the manual for specifications and recommendations to maintain your mower’s integrity and ensure long-term functionality.
This ensures your Grasshopper 725D operates safely and efficiently.
5.3 Where to Source Replacement Parts
Replacement parts for your Grasshopper 725D can be sourced directly from authorized Grasshopper dealers or through the official Grasshopper website. Genuine parts ensure compatibility and reliability. For convenience, digital downloads of manuals and parts diagrams are available online. Contact Grasshopper customer support for assistance in identifying the correct components. Always verify the authenticity of parts to maintain warranty validity and ensure optimal performance.
This guarantees your mower operates safely and efficiently.
Troubleshooting Common Issues
This section helps identify and resolve common problems with the Grasshopper 725D, such as hydraulic or electrical malfunctions, ensuring quick and effective solutions to maintain performance.
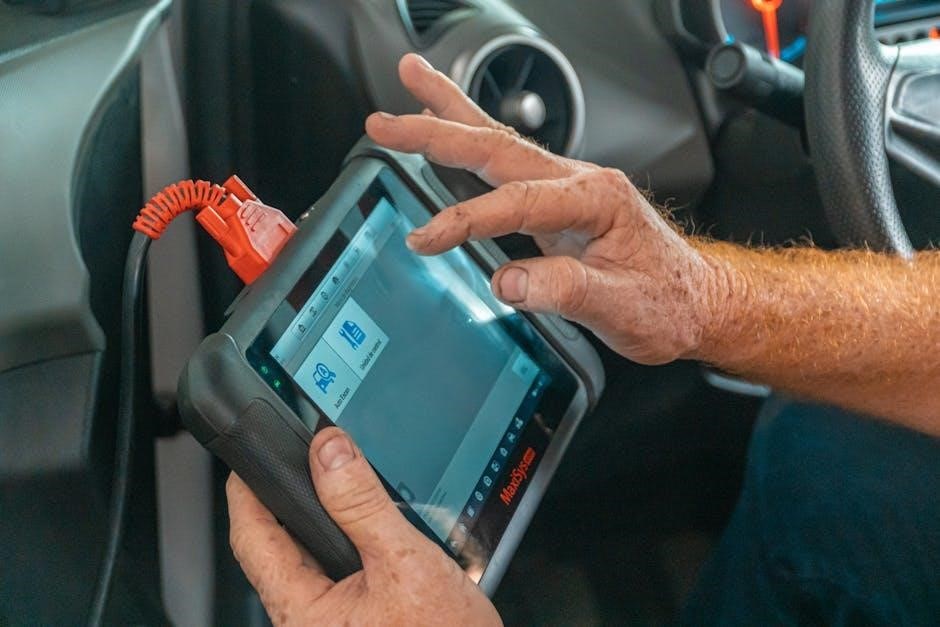
6.1 Diagnosing Hydraulic System Problems
Identify hydraulic system issues by checking fluid levels, inspecting hoses for leaks, and ensuring proper valve function. Low fluid or dirty filters can cause malfunctions. Consult wiring diagrams to trace connections and test hydraulic components. If problems persist, refer to the service manual for detailed troubleshooting steps. Regular maintenance, like filter cleaning, can prevent system failures. Addressing these issues promptly ensures optimal performance and extends the lifespan of the hydraulic system in your Grasshopper 725D mower.
6.2 Addressing Electrical System Malfunctions
Identify electrical issues by consulting the wiring diagram to trace connections and test components. Check for blown fuses, damaged wires, or faulty sensors. Inspect connectors for corrosion and ensure proper connections. Use a multimeter to verify voltage and continuity. Replace defective parts with genuine Grasshopper components. Regularly cleaning and inspecting electrical components can prevent malfunctions. Refer to the service manual for detailed diagnostic procedures to restore functionality and ensure safe operation of your Grasshopper 725D mower.
6.3 Solutions for Common Operational Faults
Identify symptoms like error codes, uneven cutting, or sudden stops. Check hydraulic fluid levels and deck adjustment for proper function. Inspect blades for damage and ensure secure connections. Address electrical faults by verifying wiring integrity and connector cleanliness. Refer to the troubleshooting guide for specific solutions. Use genuine Grasshopper parts for repairs to maintain performance. Regular maintenance can prevent recurring issues, ensuring optimal mower operation and longevity of your Grasshopper 725D.

Hydraulic and Wiring Diagrams
This section provides detailed hydraulic and wiring diagrams for the Grasshopper 725D, essential for troubleshooting and maintenance. Use these diagrams to identify components and connections accurately.
7.1 Understanding the Hydraulic Manual Lift System
The hydraulic manual lift system of the Grasshopper 725D is designed for efficient deck height adjustment. It operates via a bi-directional manual lift, utilizing hydraulic components to raise and lower the mower deck smoothly. Proper maintenance and regular checks ensure optimal performance. Refer to the wiring diagram for connections and component locations. This system is essential for precise cutting height control, enhancing mowing accuracy and productivity.
7.2 Interpreting the Wiring Diagram
The wiring diagram provides a detailed visual representation of the Grasshopper 725D’s electrical system. It illustrates connections between components like the joystick, rocker switches, and hydraulic controls. Symbols and color codes help identify wires and their functions. Understanding the diagram aids in diagnosing electrical issues and ensures safe repairs. Always refer to the manual for decoding symbols and following proper safety protocols to avoid system malfunctions.
7.3 Joystick and Rocker Switch Connections
The joystick and rocker switch connections are critical for controlling the Grasshopper 725D’s hydraulic and electrical systems. The wiring diagram outlines these connections, ensuring proper operation of the mower’s functions. Color-coded wires and symbols in the diagram help identify each connection’s purpose. Always use genuine Grasshopper parts to maintain system integrity. Follow the manual’s guidelines for safe and effective connections to prevent malfunctions and ensure optimal performance.
Accessories and Customization
Explore optional decks, bagging systems, and striping kits to customize your mower. The PowerFold electric lift simplifies adjustments, while additional features enhance performance for specific tasks.
8.1 Available Deck Options and Upgrades
The Grasshopper 725D offers versatile deck options, including 52-, 61-, and 72-inch widths; Manual FoldUp decks are available for smaller spaces, while the PowerFold electric deck lift provides effortless height adjustment. Upgrades like mulching kits and stripe kits enhance functionality. These options allow customization to suit different mowing needs and preferences, ensuring optimal performance in various conditions. Choose the right deck to maximize efficiency and achieve professional-looking results.
8.2 Adding Additional Features for Enhanced Performance
The Grasshopper 725D can be enhanced with additional features to boost productivity and versatility. Optional mulching kits and stripe kits improve cutting performance and lawn aesthetics. LED light kits enhance visibility for early morning or late evening mowing. Other upgrades, such as cargo trays or attachments, expand the mower’s functionality. These enhancements allow operators to tailor the machine to their specific needs, ensuring superior results and adaptability in various mowing conditions.
8.3 Customizing the Mower for Specific Tasks
Customizing the Grasshopper 725D allows operators to tailor the mower for specific tasks. Optional deck sizes (52-, 61-, or 72-inch) cater to different mowing needs, while manual FoldUp decks provide flexibility. Attachments like baggers, stripe kits, or mulching kits enhance functionality. Additional features such as LED light kits improve visibility, and cargo trays offer storage solutions. These customizations enable operators to optimize the mower’s performance for diverse environments and tasks, ensuring efficiency and adaptability in various mowing scenarios.
Environmental and Storage Considerations
Proper storage and eco-friendly practices ensure the Grasshopper 725D’s longevity. Winterization tips include draining fuel and protecting components from corrosion. Store in a dry, secure location.
9.1 Proper Storage Techniques
Store your Grasshopper 725D in a dry, well-ventilated area, away from direct sunlight and moisture. Clean the mower thoroughly before storage to prevent rust and corrosion. Use a breathable cover to protect from dust and debris. Ensure the mower is on a level surface and secure it to prevent accidental movement. Disconnect the battery and store it separately in a cool, dry place. Regularly inspect stored components for damage or wear.
9.2 Environmental Impact and Eco-Friendly Practices
Minimize the environmental impact by following eco-friendly practices when using the Grasshopper 725D. Regular maintenance ensures efficient fuel use and reduces emissions. Properly dispose of waste materials like oil, filters, and batteries. Use biodegradable fluids where possible and avoid spillage. Maintain mowing areas sustainably to preserve natural habitats. Follow local regulations and guidelines for eco-conscious lawn care. Using genuine parts and adhering to service schedules helps maintain optimal performance and reduces environmental footprint.
9.3 Winterization Tips for the Mower
Properly winterize your Grasshopper 725D to protect it from cold-weather damage. Drain the fuel tank or stabilize the fuel to prevent corrosion. Change the engine oil and filter to ensure cleanliness during storage. Apply a rust-inhibiting coating to metal parts and store the mower in a dry, protected area. Disconnect the battery and store it in a cool, dry place. Follow these steps to maintain your mower’s condition and ensure it’s ready for the next mowing season.
Grasshopper 725D Integration with Rhino
The Grasshopper 725D integrates seamlessly with Rhino, offering advanced 3D modeling and algorithmic design capabilities. This manual guides users on leveraging Rhino’s tools for precise mower customization and control.
10.1 Overview of Grasshopper for Rhino
Grasshopper for Rhino is a graphical algorithm editor that integrates seamlessly with Rhino’s 3D modeling tools. It enables designers to create complex shapes and patterns through parametric modeling. This tool is widely used in architectural and product design to enhance creativity and precision. Grasshopper allows users to automate tasks, generate iterations, and visualize designs in real-time. Its intuitive interface makes it accessible for both beginners and advanced users, fostering innovation in design workflows.
10;2 Using Grasshopper as a Graphical Algorithm Editor
Grasshopper serves as a powerful graphical algorithm editor within Rhino, enabling designers to create and edit parametric models visually. It allows users to build algorithms using nodes and wires, eliminating the need for complex coding. This tool streamlines the design process by enabling real-time visualization of changes. Designers can explore iterations, automate tasks, and generate complex geometries efficiently. Its intuitive interface makes it accessible for both professionals and learners, fostering creativity and innovation in 3D modeling and design workflows.
10.3 Applications in 3D Modeling and Design
Grasshopper’s integration with Rhino enables advanced applications in 3D modeling and design, particularly in architecture and product design. It facilitates the creation of complex geometries, parametric designs, and form-finding strategies. Designers can leverage Grasshopper’s tools to explore innovative shapes and optimize structures. Its capabilities extend to data visualization and environmental analysis, making it a versatile tool for both conceptual and technical design processes. This enhances creativity and precision, helping designers achieve sophisticated and functional 3D models with ease.
This manual provides comprehensive guidance for safe and efficient operation of the Grasshopper 725D. Proper maintenance, troubleshooting, and customization ensure optimal performance and longevity of the mower.
11.1 Summary of Key Points
The Grasshopper 725D manual emphasizes safety, maintenance, and troubleshooting to ensure optimal performance. It highlights proper operation, routine servicing, and customization options. Key points include using genuine parts, following safety guidelines, and regular inspections to extend equipment life. The manual also covers storage and environmental considerations, providing a comprehensive guide for users to maximize efficiency and maintain their mower effectively over time.
11.2 Final Tips for Optimal Performance
For optimal performance, always follow the manual’s guidelines, perform regular inspections, and use genuine Grasshopper parts. Store the mower properly to protect it from environmental damage. Reference wiring diagrams for complex repairs and adjust settings according to task requirements. Regularly check fluid levels and lubricate moving parts to ensure smooth operation. Adhere to safety precautions and maintenance schedules to extend the lifespan of your Grasshopper 725D and maintain its efficiency over time.
11.3 Encouragement for Further Learning
Maximize your expertise with the Grasshopper 725D by exploring advanced tutorials and resources. Engage with online forums, video guides, and courses to deepen your understanding of its features and capabilities. Continuous learning will help you master new techniques, troubleshoot effectively, and leverage the mower’s full potential. Stay updated with the latest tools and updates to enhance your operational skills and maintain peak performance.